
Origami Tutorials & Projects ● 10 Nov 2026
12 Easy Origami Projects for Beginners to Try at Home
Have you ever looked at a simple piece of paper and wondered what beautiful things you could create with it? Origami, the traditional Japanese art of paper folding, turns ordinary paper into wonderful creations using simple folds and a little creativity.

The best part? You don't need expensive supplies, special equipment, or years of experience to get started. With just a few sheets of paper and some patience, you can create beautiful flowers, cute animals, decorative objects, and useful everyday items.
If you are new to paper folding, starting with easy origami projects for beginners is a great way to learn basic techniques while enjoying the creative process.
Whether you are looking for a relaxing hobby, fun activities to do with children, or handmade decorations for your home, these 12 simple origami ideas are perfect to try at home.
Let's explore some creative paper-folding projects that anyone can enjoy!
What Do You Need to Start Origami?
Before starting your first project, gather a few basic materials. You don't need much to begin.
Here are some useful supplies:
- Origami paper: Square sheets of lightweight paper are ideal for most projects.
- Colored paper: Try different colors to make your creations more attractive.
- Ruler: Helpful for measuring and preparing square paper.
- Scissors: Useful for cutting paper into squares when needed.
- Markers: Add eyes, smiles, and small decorative details to your creations.
- Flat working surface: A clean table helps you make accurate folds.

1500 Sheets Vibrant Double-Sided Origami Paper Set
Explore colorful paper folding with 20 vibrant shades.
Bring creative ideas to life with this bulk origami paper set featuring 1,500 square sheets in 20 vibrant colors. Each 6 × 6-inch sheet is made from 70 GSM paper with the same color on both sides for a consistent finish. Ideal for kids, beginners, families, teachers, and craft enthusiasts for origami models, school projects, DIY crafts, and festive decorations.
Beginner tip: Start with larger sheets of paper because they are easier to fold and handle. Once you become comfortable with basic techniques, you can experiment with smaller paper sizes.
12 Easy Origami Projects for Beginners
Here are 12 enjoyable origami projects that you can make at home. Each project introduces simple folding techniques and helps you develop confidence with paper crafts.
1. Easy Origami Paper Boat
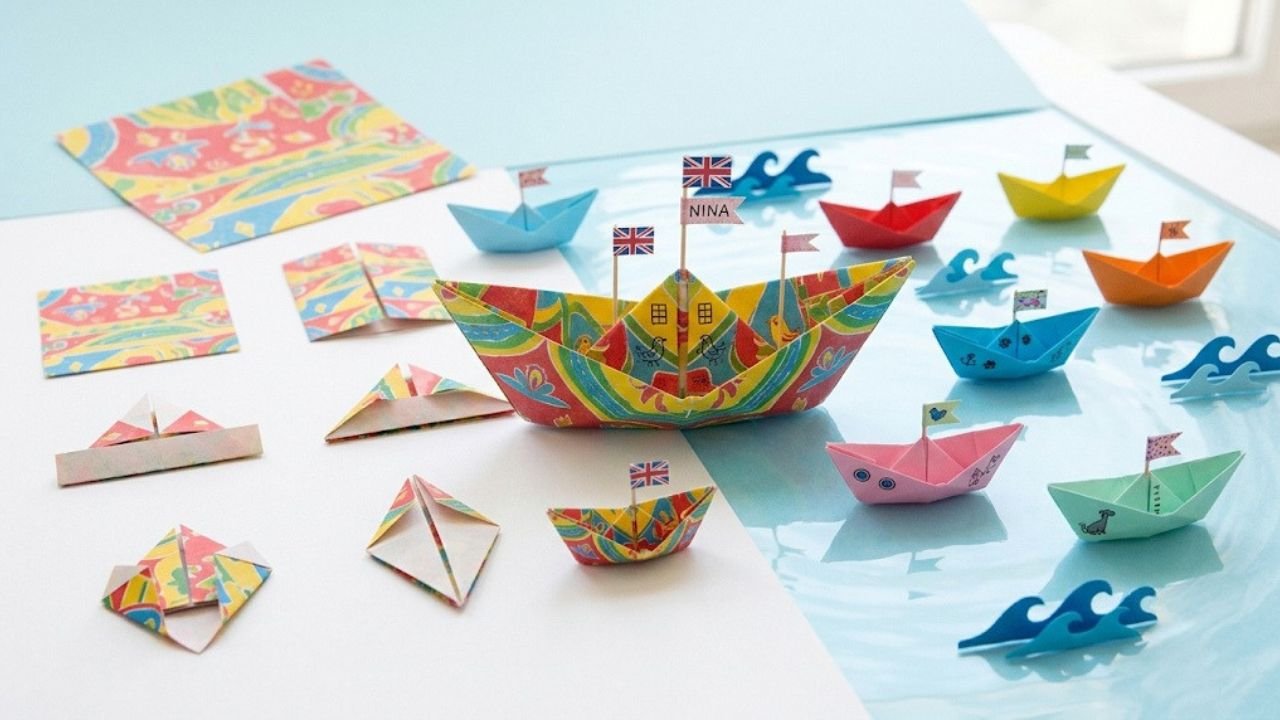
An origami paper boat is one of the most recognizable and enjoyable paper-folding projects. It is a wonderful starting point for beginners and a fun activity for children.
What you need: One rectangular sheet of paper.
How to make it:
- Fold the rectangular paper in half from top to bottom.
- Fold the top corners toward the center to create a triangle.
- Fold the bottom rectangular flaps upward on both sides.
- Open the bottom of the folded shape and bring the opposite corners together.
- Fold the bottom corner upward to form another triangle.
- Open it again and gently pull the two sides apart.
- Flatten the shape and adjust the folds to reveal your paper boat.
Creative idea: Use colorful paper and draw small windows or patterns on your boat. You can also make several boats in different sizes for a decorative display.
2. Origami Butterfly
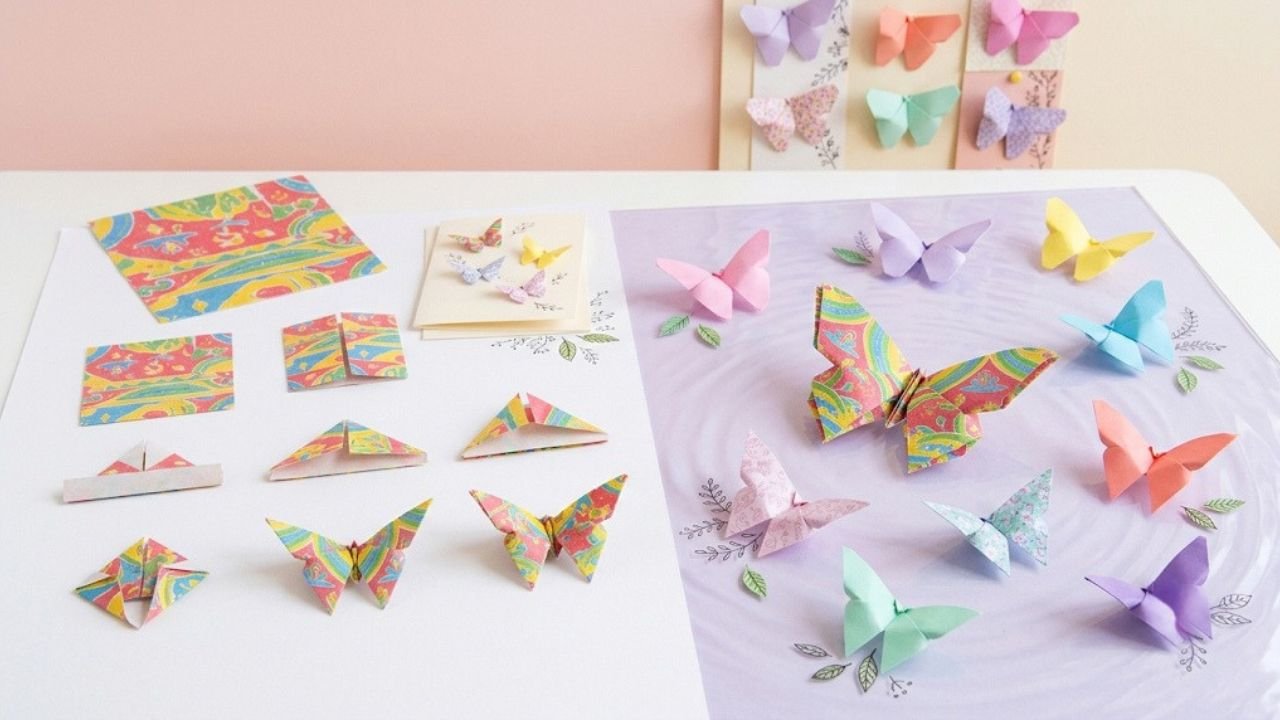
An origami butterfly is a beautiful project for anyone who loves nature-inspired paper crafts. Its simple wing shapes make it an attractive decoration for walls, greeting cards, and handmade gifts.
What you need: One square sheet of origami paper.
How to make it:
- Fold the paper diagonally in both directions and unfold it.
- Fold it in half horizontally and vertically.
- Bring the sides inward to create a triangular base.
- Fold the upper layer's bottom corners upward toward the top point.
- Turn the model over and fold the top point slightly downward.
- Fold the model in half along the center crease.
- Gently separate and shape the wings.
Creative idea: Make butterflies in different colors and attach them to a handmade greeting card or a decorative wall arrangement.
500 Sheets Colorful Origami Paper with 100 Designs
Enjoy creative paper folding with vibrant colors and easy tutorials.
Explore the art of paper folding with 500 premium-quality origami sheets in 20 vibrant colors, each measuring 6 × 6 inches. The paper is designed to fold easily, hold creases, and resist tearing. The set also includes a free downloadable ebook featuring over 100 origami designs, making it suitable for beginners, students, teachers, and experienced paper craft enthusiasts.

3. Origami Dog Face
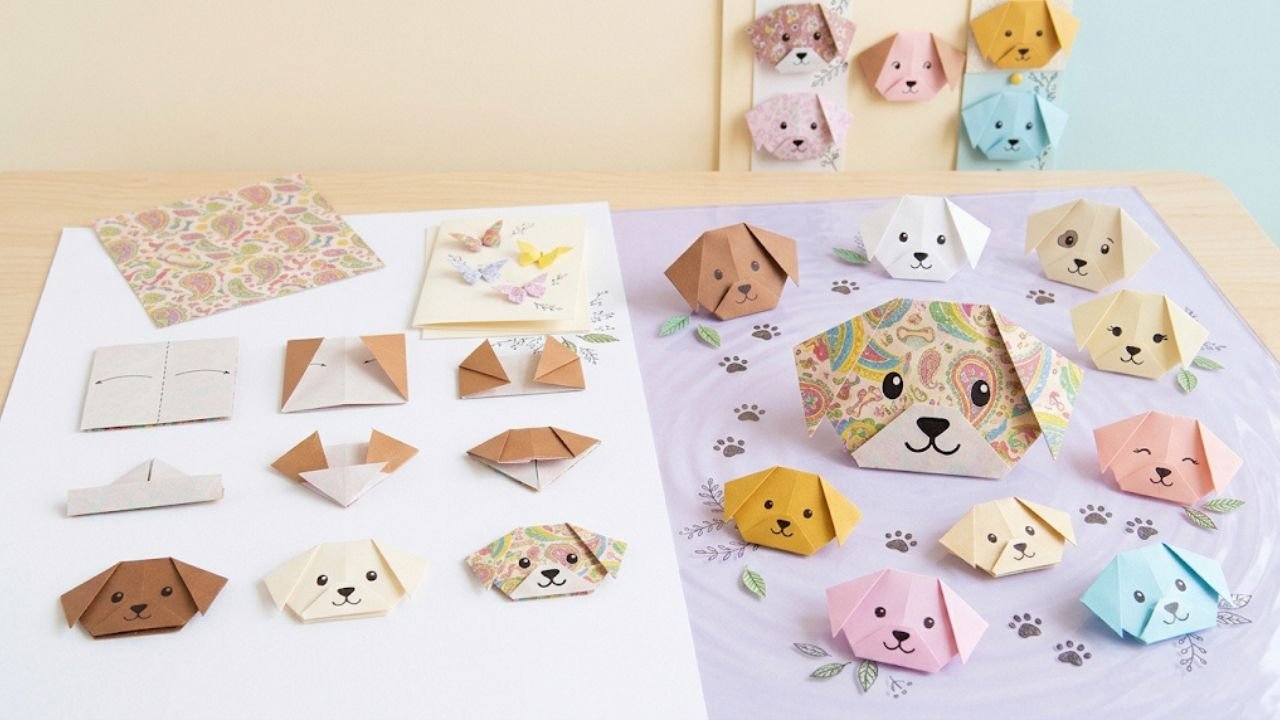
Looking for something cute and simple? An origami dog face is a great beginner project. It is especially enjoyable for children because you can personalize it with different facial expressions.
What you need: One square sheet of paper and a marker.
How to make it:
- Fold your square paper diagonally to create a triangle.
- Position the triangle with its point facing downward.
- Fold the left and right corners downward to create floppy ears.
- Fold the bottom point slightly upward to shape the dog's face.
- Use a marker to draw two eyes, a nose, and a smiling mouth.
Creative idea: Experiment with different colors and expressions to create a collection of adorable paper dogs.
4. Easy Origami Bookmark
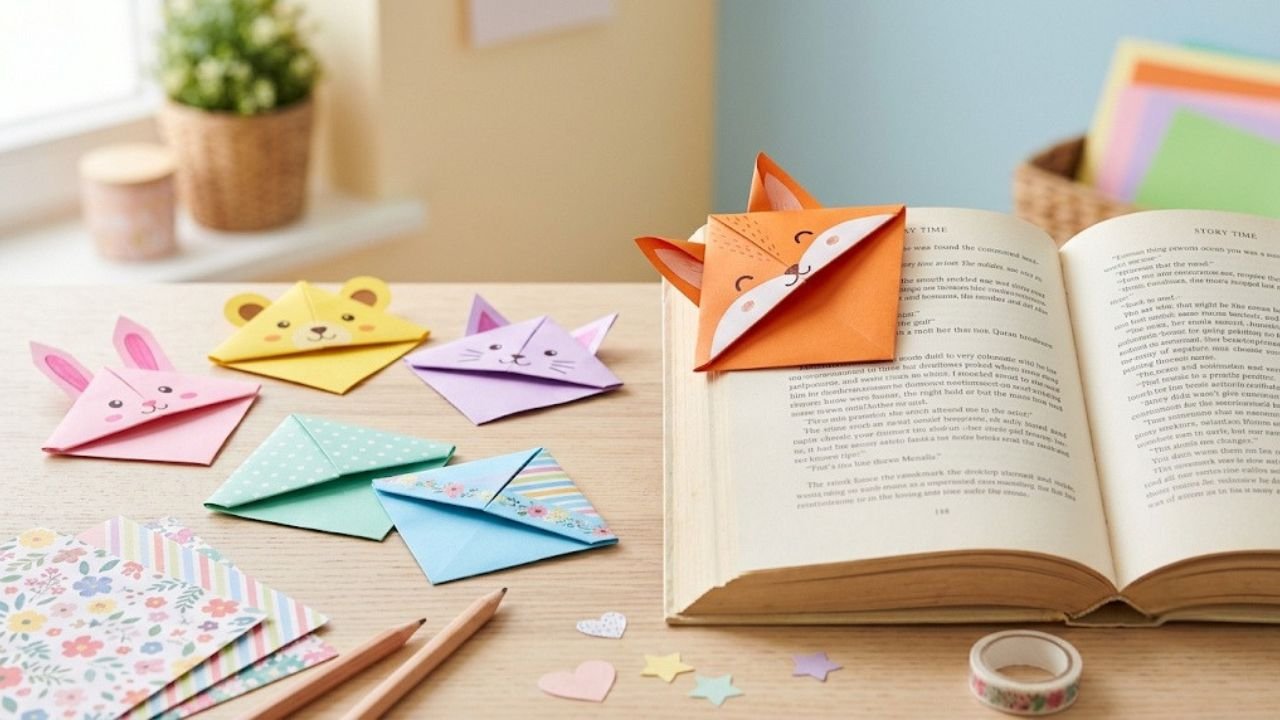
An origami corner bookmark is both creative and useful. Unlike ordinary bookmarks, it fits over the corner of a page and stays in place while you read.
What you need: One square sheet of paper.
How to make it:
- Fold the square paper diagonally into a triangle.
- Place the triangle with its longest side at the bottom.
- Fold the left and right corners upward toward the top point.
- Open the two corner folds.
- Fold only the top layer's upper point downward toward the center.
- Bring the left corner upward and tuck its point into the pocket.
- Repeat with the right corner.
- Decorate your bookmark with eyes, flowers, or other small designs.
Creative idea: Make animal-themed bookmarks featuring cats, foxes, bears, or other cute characters.

Kids Origami Flower Craft Kit with Colorful Supplies
Create beautiful 3D paper flowers with fun craft accessories.
Introduce children to the creative art of paper folding with this 150-piece flower origami kit. It includes 100 colorful folding sheets, 20 chenille stems, 30 buttons and decorative gems, plus an instruction booklet. Designed for making beautiful 3D paper flowers, this engaging craft set is ideal for kids, beginners, school activities, and creative projects at home.
5. Origami Tulip Flower
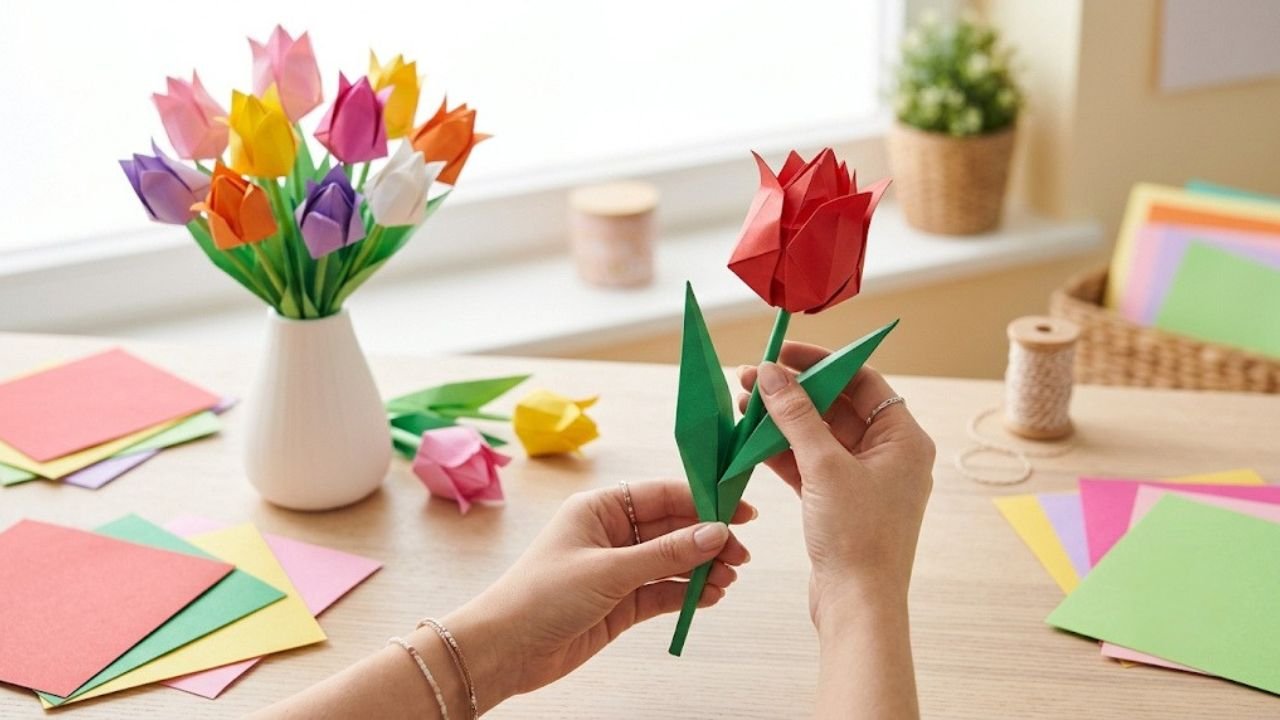
Paper flowers are lovely decorations and thoughtful handmade gifts. An origami tulip is a simple way to bring colorful floral designs into your paper-folding collection.
What you need: One square sheet of paper for the flower and another green sheet for the stem.
How to make it:
- Fold the flower paper diagonally to form a triangle.
- Fold it diagonally again and unfold to create guide creases.
- Bring the bottom corners upward at an angle to form the tulip petals.
- Adjust the folds to create a balanced flower shape.
- For the stem, fold the green paper diagonally and unfold it.
- Fold the left and right edges toward the center crease.
- Fold the bottom tip upward to create a simple stem.
- Join the flower and stem to complete your paper tulip.
Creative idea: Make a colorful bouquet using different paper shades. Display your flowers in a small handmade vase.
Ultimate Origami Challenge Book and Paper Folding Kit
Master creative paper folding through 30 exciting origami projects.
Make paper folding an exciting learning adventure with this illustrated origami kit for children aged 8–12. It includes a 128-page hardcover book, 90 colorful 7 × 7-inch folding sheets, and 30 step-by-step projects featuring animals, geometric shapes, and interactive creations. Fun facts and clear illustrations help develop creativity, problem-solving, concentration, and fine motor skills.

6. Origami Heart
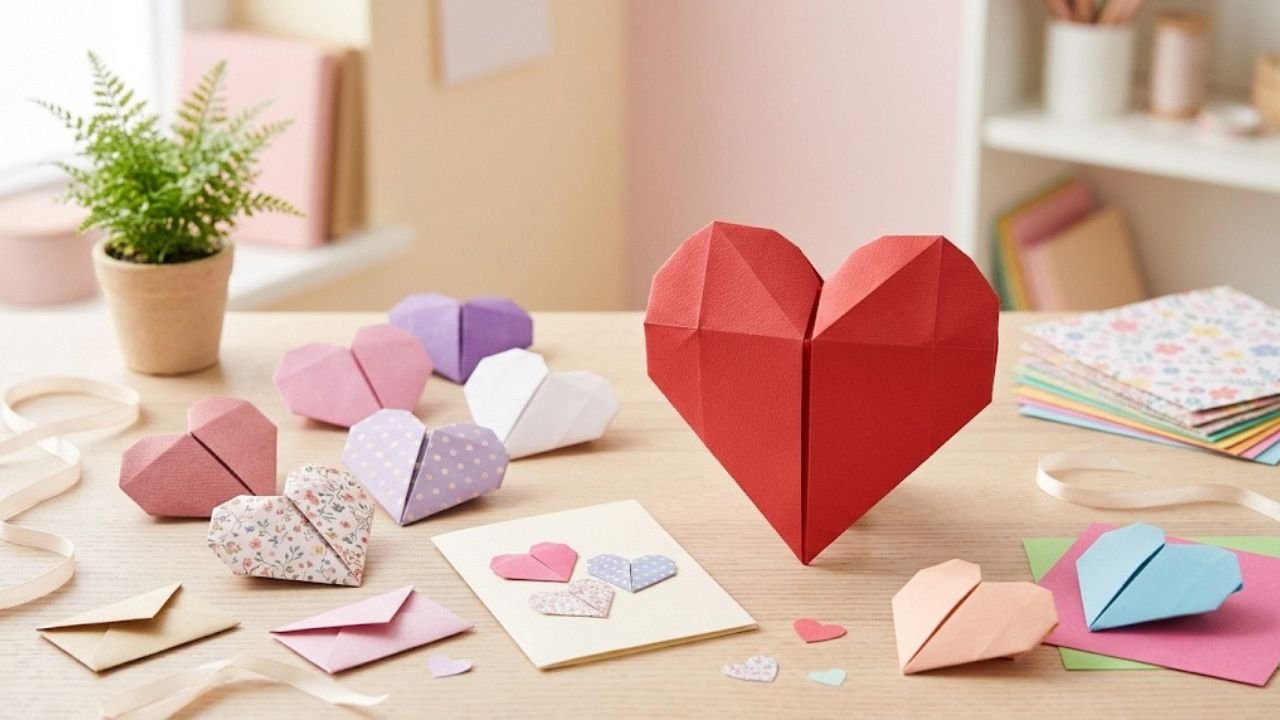
An origami heart is a wonderful handmade creation for birthdays, anniversaries, Valentine's Day, or simply expressing appreciation for someone special.
What you need: One square sheet of paper.
How to make it:
- Fold the paper in half horizontally and unfold it.
- Fold the top edge down toward the center crease.
- Turn the paper over.
- Fold the bottom edge upward to meet the top folded section.
- Fold both bottom corners inward to create a pointed heart shape.
- Fold the upper corners inward slightly to create rounded edges.
- Adjust the folds to make the heart look neat and symmetrical.
Creative idea: Write a small message inside or use your origami heart as a decoration for handmade greeting cards.
7. Traditional Origami Crane
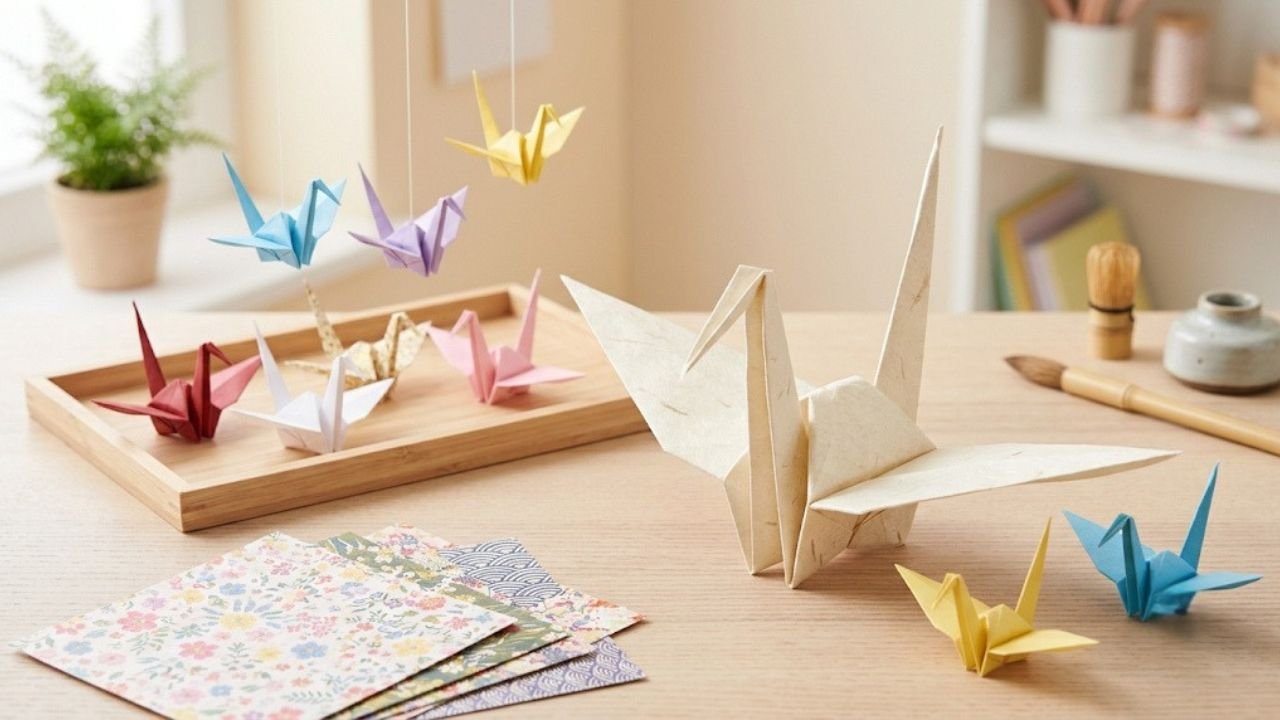
The origami crane is one of the most famous designs in Japanese paper-folding culture. It may look challenging at first, but following the basic folds carefully makes it an enjoyable learning experience.
What you need: One square sheet of origami paper.
How to make it:
- Fold the paper diagonally in both directions and unfold.
- Fold it in half horizontally and vertically.
- Use the creases to collapse the paper into a square base.
- Fold the top edges toward the center crease.
- Fold the top point downward and unfold these three folds.
- Lift the bottom point upward and flatten it into a long diamond shape. Repeat on the other side.
- Fold the lower edges inward to make the neck and tail narrower.
- Reverse-fold one end to form the head and the other to shape the tail.
- Fold the wings downward and gently pull them apart.
Creative idea: Create several cranes in different colors and hang them together as a decorative paper installation.

WUTA Natural Bone Folder for Origami and Paper Crafts
Create crisp, precise folds with a smooth natural bone tool.
Enhance your paper crafting with this WUTA natural ox bone folder, measuring approximately 6 inches long and 20 mm wide. Featuring one pointed end and one rounded end, it helps create clean creases, score paper, and smooth folded surfaces. Ideal for origami, bookbinding, scrapbooking, card making, and other DIY paper craft projects.
8. Easy Origami Fish
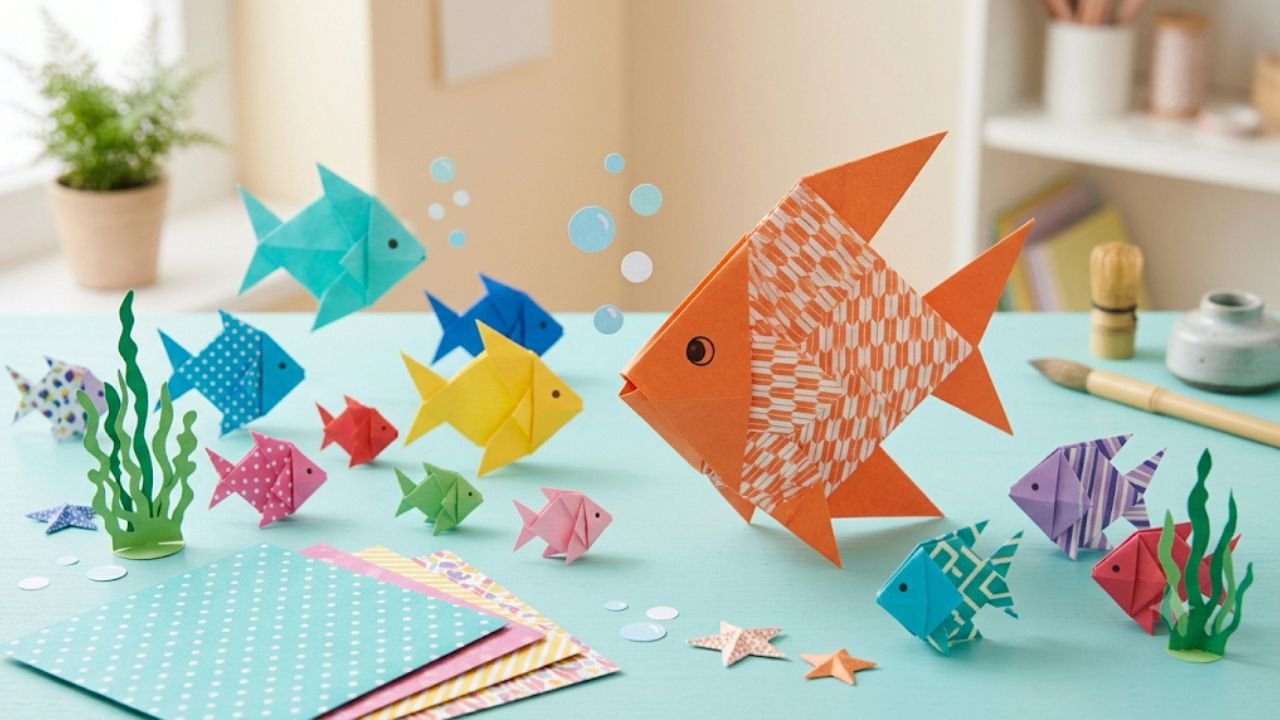
An origami fish is a fun project inspired by underwater life. Its simple shape makes it suitable for beginners and children who enjoy making animal-themed paper crafts.
What you need: One square sheet of paper.
How to make it:
- Fold the square diagonally to create a triangle and unfold.
- Fold the left and right edges toward the center.
- Fold the model in half along the center crease.
- Fold one end outward to create the tail.
- Adjust the opposite end to form the fish's face.
- Draw an eye and decorate the body with colorful patterns.
Creative idea: Make fish in different colors and sizes to create a paper underwater scene.
9. Origami Fortune Teller
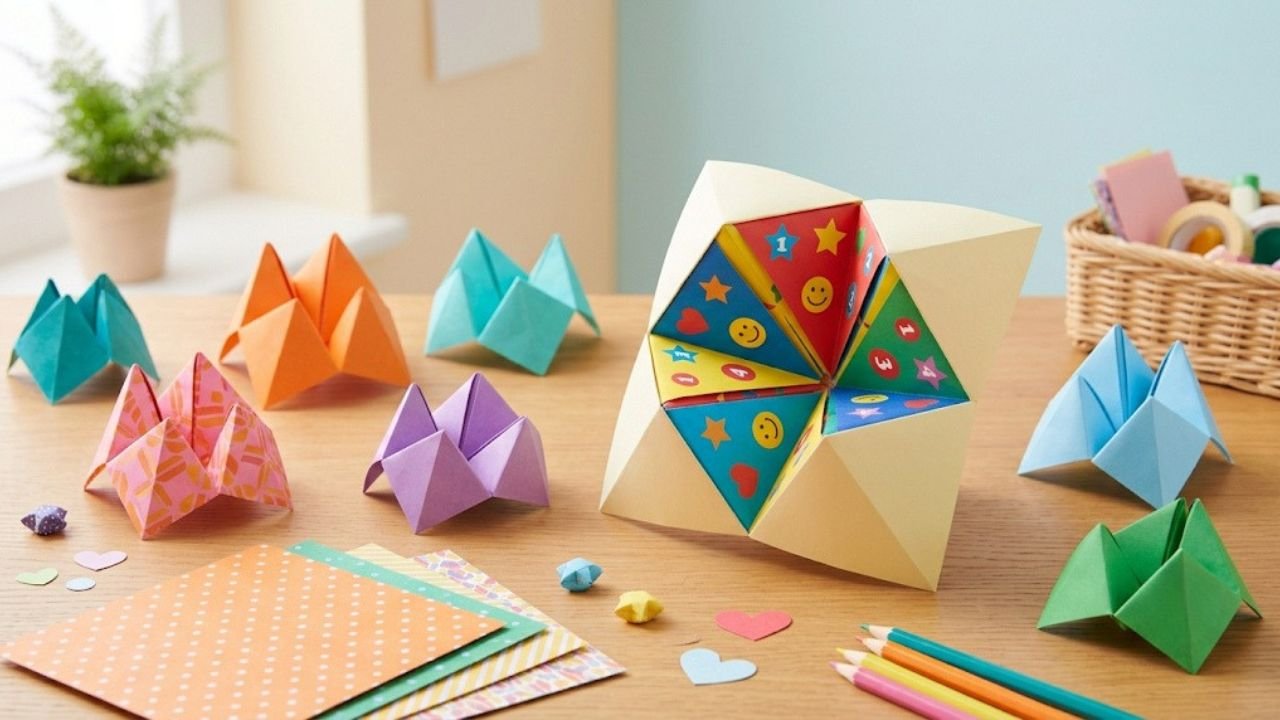
Remember those folded paper games that reveal funny messages or predictions? An origami fortune teller is a playful project that combines paper folding with entertainment.
What you need: One square sheet of paper and colored markers.
How to make it:
- Fold the paper diagonally in both directions and unfold.
- Fold all four corners toward the center.
- Turn the paper over.
- Fold all four corners toward the new center point.
- Fold the model in half horizontally and vertically.
- Insert your fingers into the four pockets underneath.
- Open and close the fortune teller to test its movement.
Creative idea: Write numbers, colors, jokes, or fun challenges inside the folded sections. It is a great activity for family gatherings and children's parties.
Kool Krafts Origami Paper Kit with 25 Projects
Explore colorful paper folding with patterns and guided projects.
Spark creativity with this 350-sheet origami kit featuring 300 square sheets in 20 vibrant colors and 50 traditional Japanese pattern sheets. Each sheet measures 6 × 6 inches and has a 70 GSM matte finish for crisp folds. The kit also includes an illustrated book with 25 easy projects, making it ideal for children aged 8–12, beginners, and family craft activities.

10. Origami Pinwheel
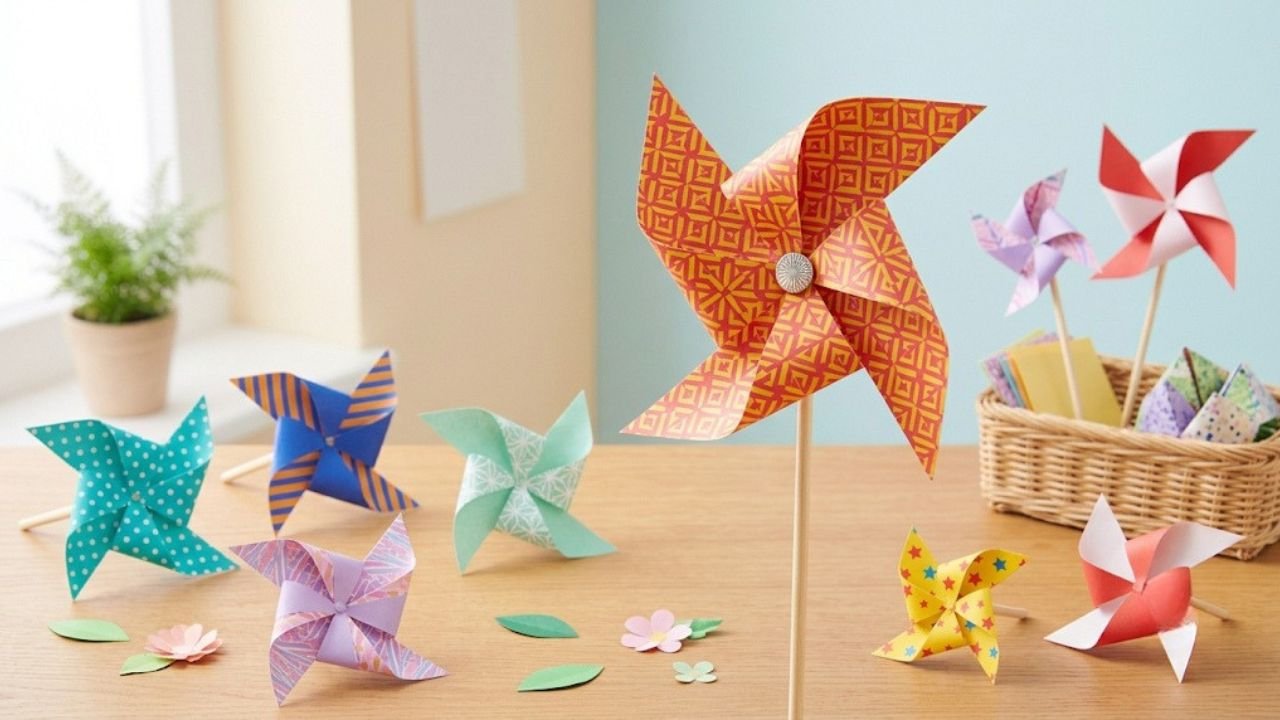
An origami pinwheel is a colorful decorative craft that adds a playful touch to your home or party decorations.
What you need: One square sheet of paper, a paper straw or stick, and a suitable fastener.
How to make it:
- Fold the square paper diagonally in both directions and unfold.
- Cut along each diagonal crease, stopping before reaching the center.
- Bring alternate corners toward the center.
- Secure the folded corners at the center with a suitable fastener.
- Attach the center carefully to a paper straw or decorative stick.
Creative idea: Use two-sided colored paper to create attractive pinwheels for birthday parties, garden decorations, or handmade displays.
11. Easy Origami Envelope
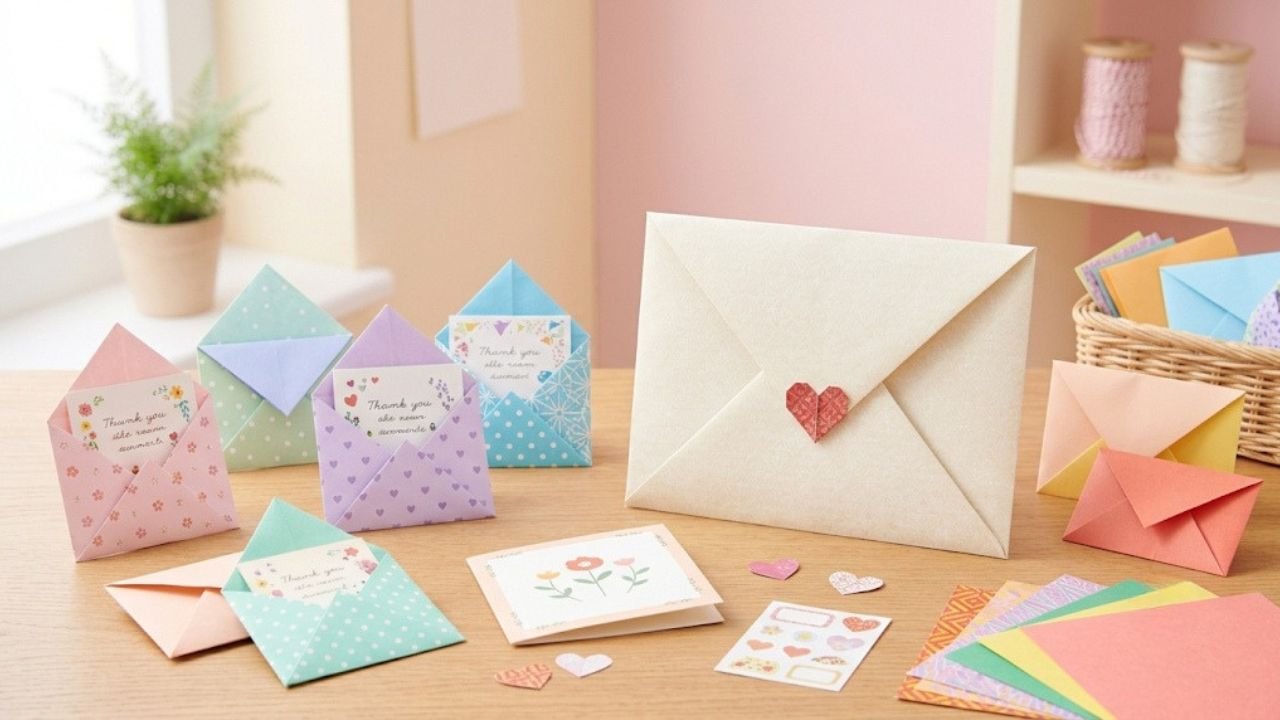
Why buy a decorative envelope when you can make one yourself? An origami envelope is a simple and useful paper craft for presenting small notes, gift messages, and greeting cards.
What you need: One square sheet of paper.
How to make it:
- Place your square paper on a flat surface.
- Fold the bottom corner upward toward the center.
- Fold the left and right corners inward so they slightly overlap.
- Fold the bottom section upward to form the envelope pocket.
- Fold the top corner downward to create the closing flap.
- Tuck the flap into the pocket to secure the envelope.
Creative idea: Use patterned paper and decorate the envelope with stickers or small drawings. It is perfect for handwritten messages and gift cards.
12. Simple Origami Gift Box
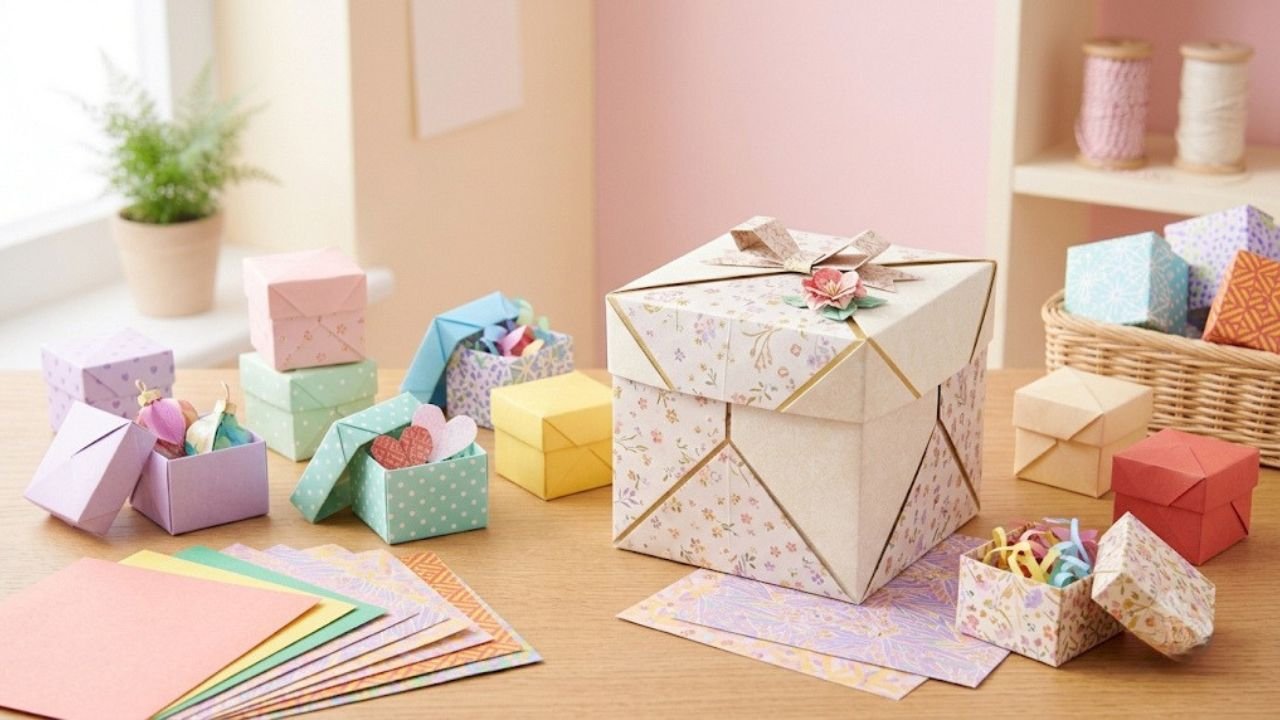
An origami gift box is a practical and attractive project that can help you present small handmade gifts in a creative way.
What you need: Two square sheets of paper, one slightly smaller than the other.
How to make it:
- Take the larger square sheet and fold it diagonally in both directions.
- Unfold and fold all four corners toward the center.
- Fold the top and bottom edges toward the center and unfold.
- Fold the left and right edges toward the center and unfold.
- Open two opposite corners.
- Lift the remaining sides and fold them inward to create the box walls.
- Fold the open corner sections over the sides to secure the shape.
- Repeat the process with the smaller paper to create the lid.
Creative idea: Use decorative paper to create gift boxes for jewelry, small accessories, or handmade surprises.
Tips for Beginners to Improve Their Origami Skills
Learning origami is a gradual process. You don't need to master every design on your first attempt. A little practice can make a big difference.
Here are some helpful tips:
1. Start with simple designs
Begin with basic projects such as paper boats, hearts, and dog faces. Move toward more detailed models as your confidence improves.
2. Use square paper
Most traditional origami designs use square sheets. Starting with properly cut paper makes folding easier and more accurate.
3. Make clean creases
Press each fold firmly using your fingers. Neat creases help your paper model maintain its shape.
4. Follow instructions step by step
Avoid skipping folds, even when they look unimportant. Small folding details often make a big difference in the final result.
5. Practice with different paper types
Experiment with lightweight origami paper, colored craft paper, and patterned sheets to discover what works best.
6. Be patient and enjoy the process
Your first model may not look perfect, and that is completely normal. Every project teaches you a new folding technique.
Why Is Origami a Great Hobby to Try at Home?
Origami is more than simply folding paper. It is a creative activity that gives you an opportunity to explore shapes, colors, and designs.
Here are some reasons why people enjoy origami:
- Affordable creativity: You can start with inexpensive paper and basic materials.
- Family-friendly activity: Children and adults can enjoy making paper crafts together.
- Handmade decorations: Origami flowers, butterflies, and animals can brighten up your home.
- Personalized gifts: Handmade paper creations add a thoughtful touch to special occasions.
- Creative learning: Different projects introduce folding patterns, shapes, and spatial thinking.
- Relaxing pastime: Concentrating on folds and patterns can provide an enjoyable break from everyday routines.
The best thing about origami is that there is always something new to learn, regardless of your experience level.
Frequently Asked Questions About Easy Origami
1. What is the easiest origami project for beginners?
An origami paper boat, dog face, and simple heart are excellent starting points. They require only a few basic folds and are easy to make using square or rectangular paper.
2. Can I make origami with normal paper?
Yes! You can use regular printer paper, colored craft paper, or lightweight paper. However, square origami paper is usually easier to work with because it is designed for paper-folding projects.
3. Is origami suitable for children?
Yes. Many simple origami projects are suitable for children with age-appropriate supervision. Paper boats, fish, butterflies, and dog faces are enjoyable options for creative activities.
4. How long does it take to learn origami?
Simple projects may take only a few minutes, while more detailed models can require additional time and practice. Beginners can start with basic folds and gradually explore more complex designs.
5. What paper size is best for beginner origami?
A 15 × 15 cm (6 × 6 inch) square sheet is a convenient starting size for many beginner projects. Larger sheets can be helpful when learning unfamiliar folds.
6. Can origami be used for home decoration?
Absolutely! Origami flowers, butterflies, cranes, and decorative boxes can be used to create attractive displays, wall decorations, table arrangements, and handmade gifts.
Final Thoughts
Origami is a wonderful way to turn simple sheets of paper into something creative, beautiful, and useful. From a basic paper boat to an elegant traditional crane, every project offers an opportunity to learn a new folding technique.
These 12 easy origami projects for beginners are a great starting point if you want to explore paper folding at home. Try one project at a time, experiment with different colors, and enjoy creating something with your own hands.
Remember, you don't need to be an expert to make beautiful origami. All you need is a piece of paper, a little patience, and the willingness to try.
Explore more creative paper-folding ideas with Tulsi Origami and discover how simple paper can become beautiful art!
Comments
0 approved comment(s)
No comments yet. Be the first to share your thoughts!